Hướng dẫn chi tiết cài đặt Kali Linux trên VMware
Nội dung bài viết
Kali Linux, hệ điều hành chuyên biệt dành cho các chuyên gia bảo mật và hacker, sở hữu kho công cụ bảo mật đa dạng. Bài viết này sẽ hướng dẫn bạn cách cài đặt và khám phá Kali Linux thông qua máy ảo VMware một cách dễ dàng.
![](https://img.tripi.vn/cdn-cgi/image/width=700,height=700/https://gcs.tripi.vn/public-tripi/tripi-feed/img/482682NPU/anh-mo-ta.png)
1. Các bước thiết lập Kali Linux trên VMware
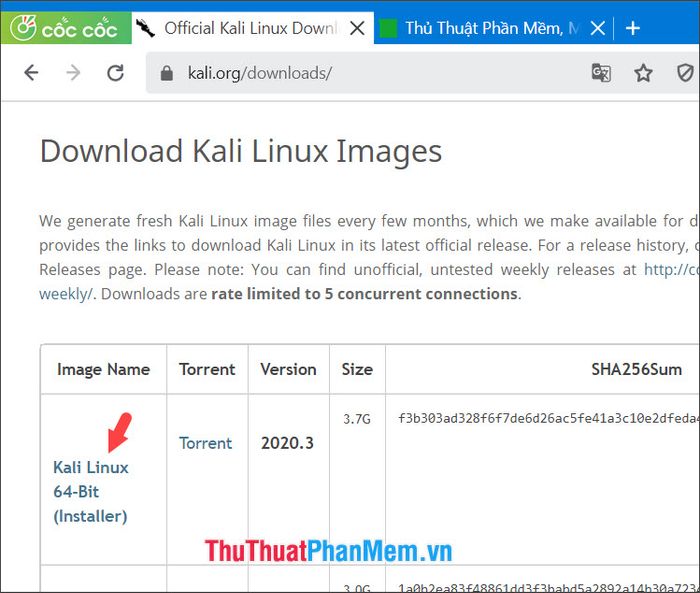
Đầu tiên, hãy truy cập trang chủ https://www.kali.org/downloads/ để tải xuống bộ cài đặt Kali Linux phù hợp.
Hãy nhấp vào Kali Linux 64-Bit (Installer) để tải xuống bộ cài đặt.
![](https://img.tripi.vn/cdn-cgi/image/width=700,height=700/https://gcs.tripi.vn/public-tripi/tripi-feed/img/482682DDb/anh-mo-ta.png)
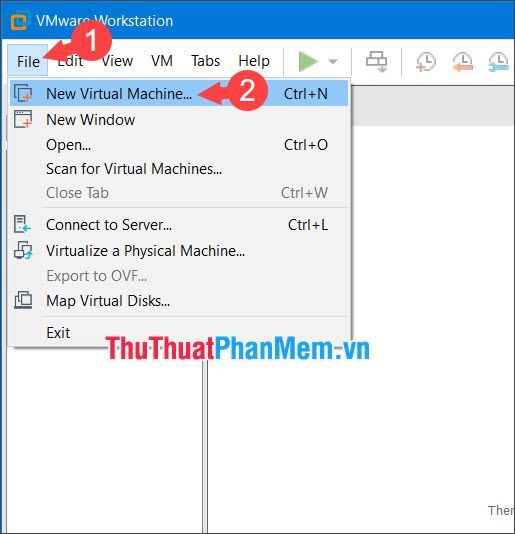
Bước 1: Mở VMware, chọn menu File (1) => New Virtual Machine… (2) để bắt đầu tạo máy ảo mới.
![](https://img.tripi.vn/cdn-cgi/image/width=700,height=700/https://gcs.tripi.vn/public-tripi/tripi-feed/img/482682gDs/anh-mo-ta.png)
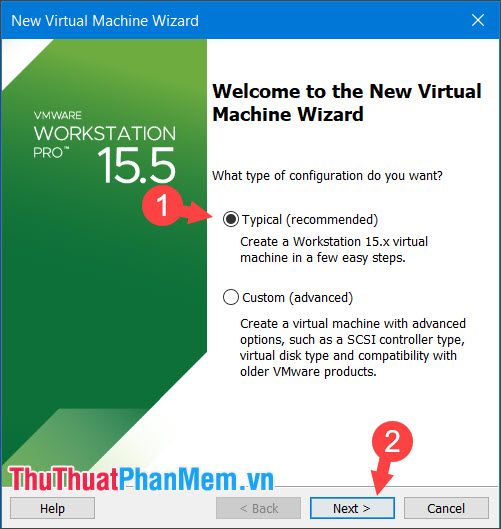
Bước 2: Chọn Typical (1) => nhấn Next (2) để tiếp tục thiết lập.
![](https://img.tripi.vn/cdn-cgi/image/width=700,height=700/https://gcs.tripi.vn/public-tripi/tripi-feed/img/482682vGR/anh-mo-ta.png)
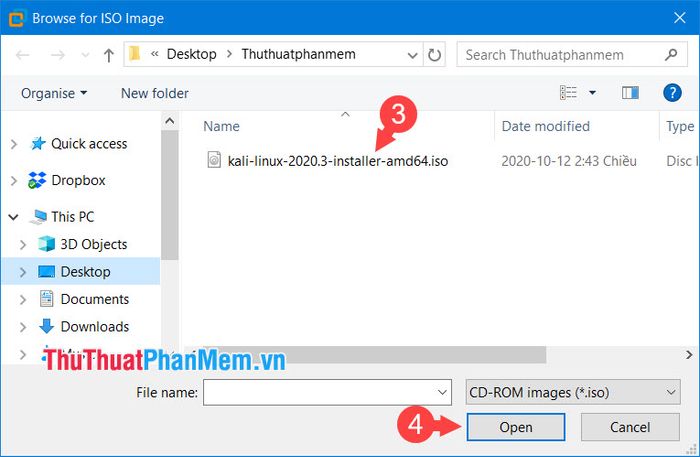
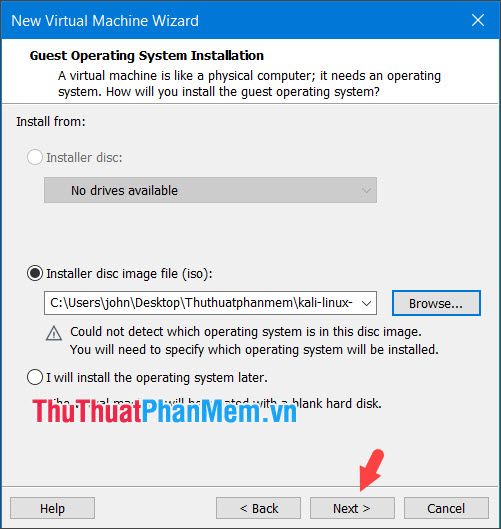
Bước 3: Tích vào Installed disc image file (1) => nhấn Browse (2) để chọn file ISO đã tải về.
![](https://img.tripi.vn/cdn-cgi/image/width=700,height=700/https://gcs.tripi.vn/public-tripi/tripi-feed/img/482682Rwf/anh-mo-ta.png)
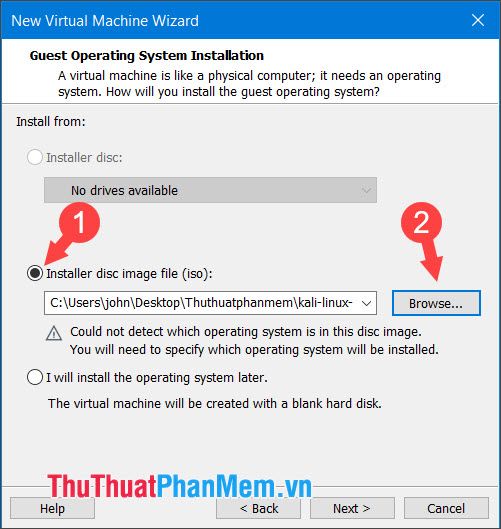
Tiếp theo, bạn chọn file ISO (3) => nhấn Open (4) để mở file cài đặt.
![](https://img.tripi.vn/cdn-cgi/image/width=700,height=700/https://gcs.tripi.vn/public-tripi/tripi-feed/img/482682kHK/anh-mo-ta.png)
Nhấn Next để tiếp tục quá trình thiết lập.
![](https://img.tripi.vn/cdn-cgi/image/width=700,height=700/https://gcs.tripi.vn/public-tripi/tripi-feed/img/482682qmq/anh-mo-ta.png)
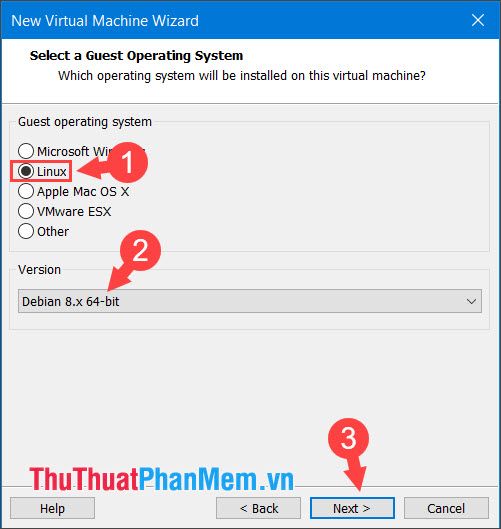
Bước 4: Chọn hệ điều hành Linux (1) => Debian 8.x 64-bit (2) => nhấn Next (3) để tiếp tục.
![](https://img.tripi.vn/cdn-cgi/image/width=700,height=700/https://gcs.tripi.vn/public-tripi/tripi-feed/img/482682ELu/anh-mo-ta.png)
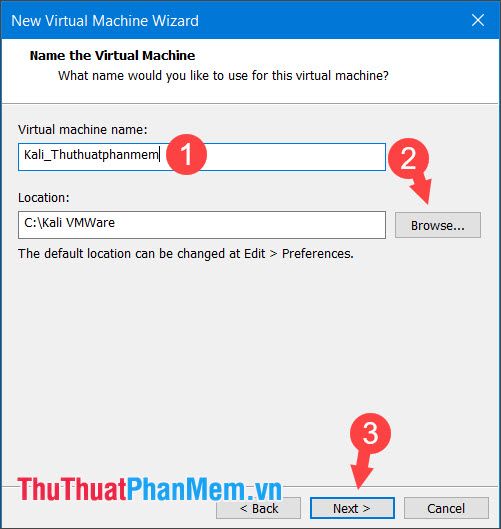
Bước 5: Đặt tên cho máy ảo (1) => nhấn Browse... (2) để chọn vị trí lưu máy ảo. Sau đó, nhấn Next (3) để tiếp tục.
![](https://img.tripi.vn/cdn-cgi/image/width=700,height=700/https://gcs.tripi.vn/public-tripi/tripi-feed/img/482682pev/anh-mo-ta.png)
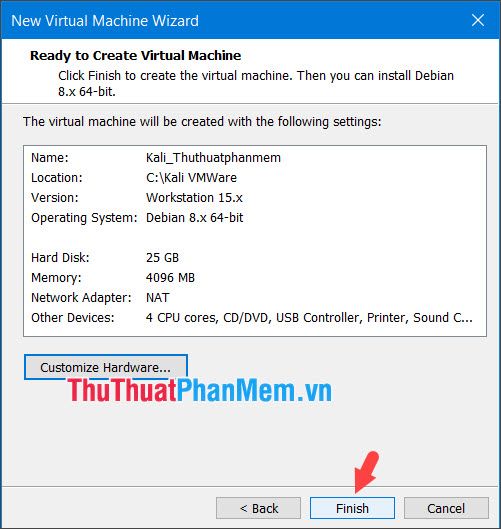
Bước 6: Thiết lập dung lượng ổ đĩa (1) tối thiểu 20GB. Sau đó, chọn Store virtual disk as a single file (2) => nhấn Next (3) để tiếp tục.
![](https://img.tripi.vn/cdn-cgi/image/width=700,height=700/https://gcs.tripi.vn/public-tripi/tripi-feed/img/482682ZMQ/anh-mo-ta.png)
Nhấn Finish để hoàn tất quá trình thiết lập máy ảo.
![](https://img.tripi.vn/cdn-cgi/image/width=700,height=700/https://gcs.tripi.vn/public-tripi/tripi-feed/img/482682nwE/anh-mo-ta.png)
2. Tiến hành cài đặt Kali Linux
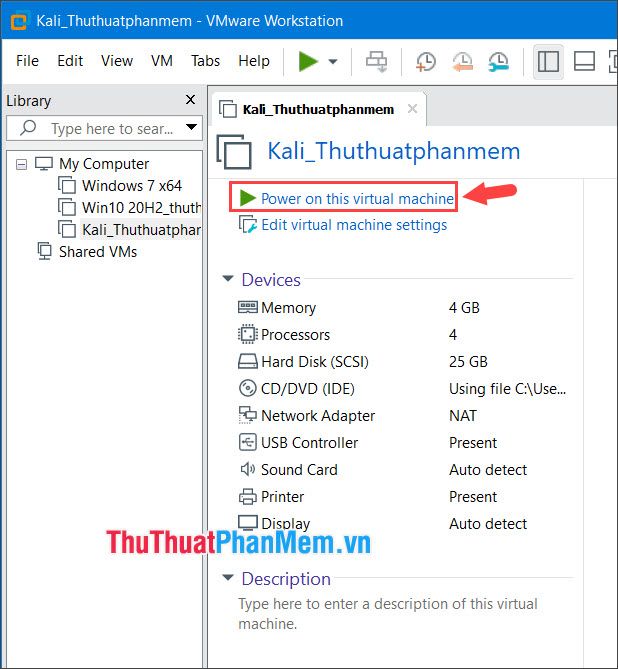
Bước 1: Chọn máy ảo Kali Linux vừa tạo và nhấn Power on this virtual machine để khởi động.
![](https://img.tripi.vn/cdn-cgi/image/width=700,height=700/https://gcs.tripi.vn/public-tripi/tripi-feed/img/482682inb/anh-mo-ta.png)
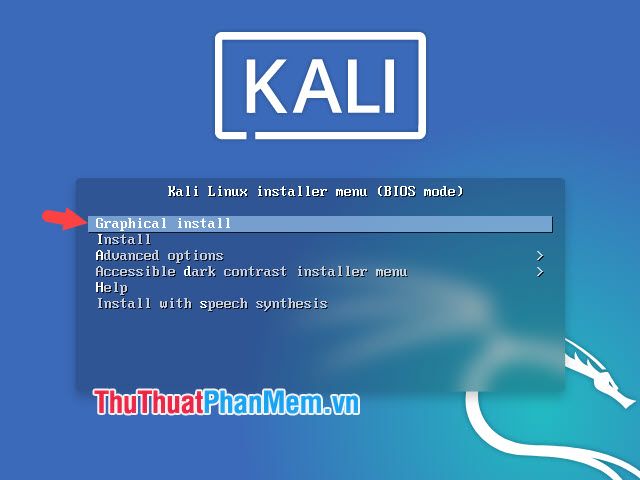
Tại menu Boot, bạn chọn Graphical install để bắt đầu cài đặt với giao diện đồ họa.
![](https://img.tripi.vn/cdn-cgi/image/width=700,height=700/https://gcs.tripi.vn/public-tripi/tripi-feed/img/482682jLz/anh-mo-ta.png)
Bước 2: Chọn ngôn ngữ English (1) => nhấn Continue (2) để tiếp tục.
![](https://img.tripi.vn/cdn-cgi/image/width=700,height=700/https://gcs.tripi.vn/public-tripi/tripi-feed/img/482682Owj/anh-mo-ta.png)
Tiếp theo, chọn vùng United States (3) => nhấn Continue (4).
![](https://img.tripi.vn/cdn-cgi/image/width=700,height=700/https://gcs.tripi.vn/public-tripi/tripi-feed/img/482682Yzy/anh-mo-ta.png)
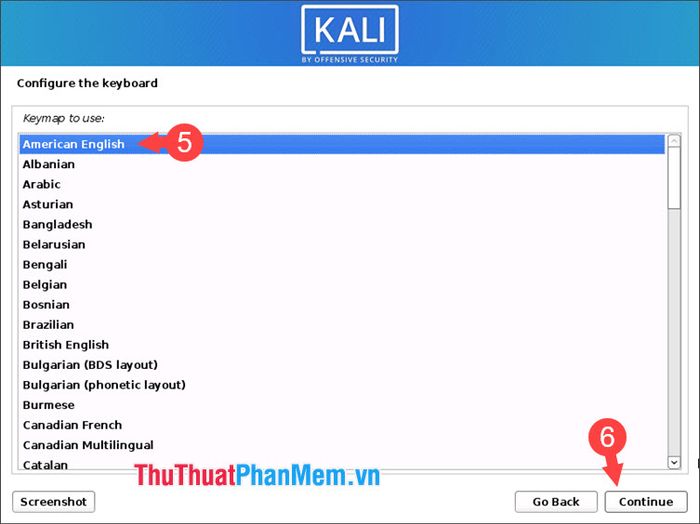
Chọn kiểu bàn phím American English (5) => nhấn Continue (6) để hoàn tất thiết lập.
![](https://img.tripi.vn/cdn-cgi/image/width=700,height=700/https://gcs.tripi.vn/public-tripi/tripi-feed/img/482682Zrz/anh-mo-ta.png)
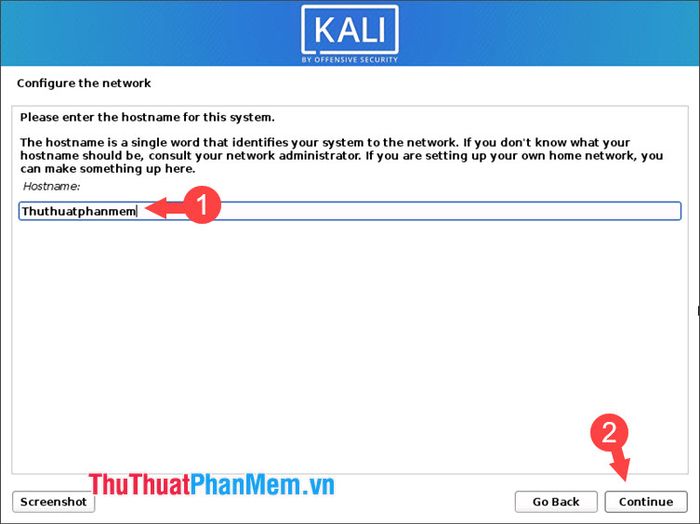
Bước 3: Nhập tên cho mạng ảo (1) => nhấn Continue (2) để tiếp tục.
![](https://img.tripi.vn/cdn-cgi/image/width=700,height=700/https://gcs.tripi.vn/public-tripi/tripi-feed/img/482682ZAu/anh-mo-ta.png)
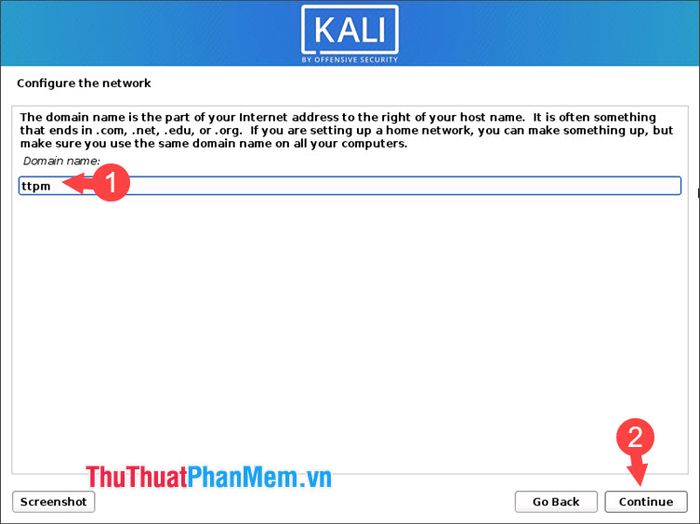
Bước 4: Đặt tên cho domain (1) => nhấn Continue (2) để chuyển sang bước tiếp theo.
![](https://img.tripi.vn/cdn-cgi/image/width=700,height=700/https://gcs.tripi.vn/public-tripi/tripi-feed/img/482682MrH/anh-mo-ta.png)
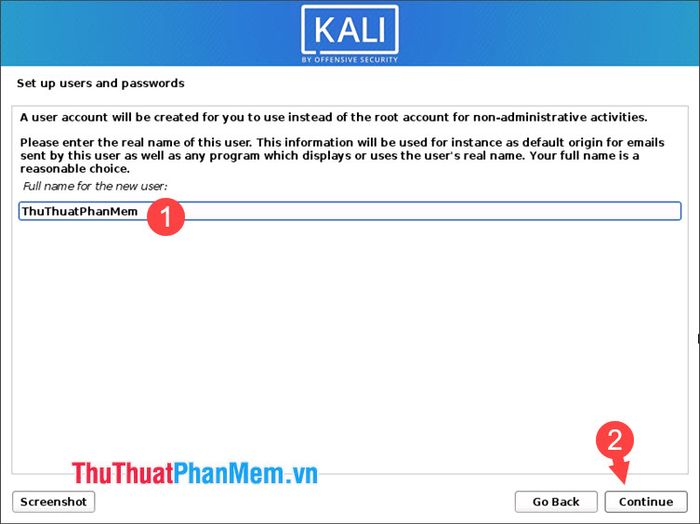
Bước 5: Nhập tên của bạn (1) => nhấn Continue (2) để tiếp tục cài đặt.
![](https://img.tripi.vn/cdn-cgi/image/width=700,height=700/https://gcs.tripi.vn/public-tripi/tripi-feed/img/482682wRU/anh-mo-ta.png)
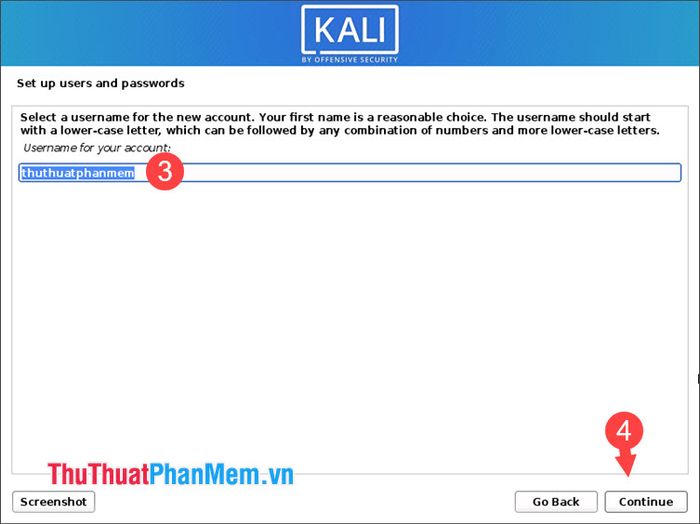
Đặt tên cho User (3) => nhấn Continue (4) để hoàn tất thiết lập người dùng.
![](https://img.tripi.vn/cdn-cgi/image/width=700,height=700/https://gcs.tripi.vn/public-tripi/tripi-feed/img/482682TYm/anh-mo-ta.png)
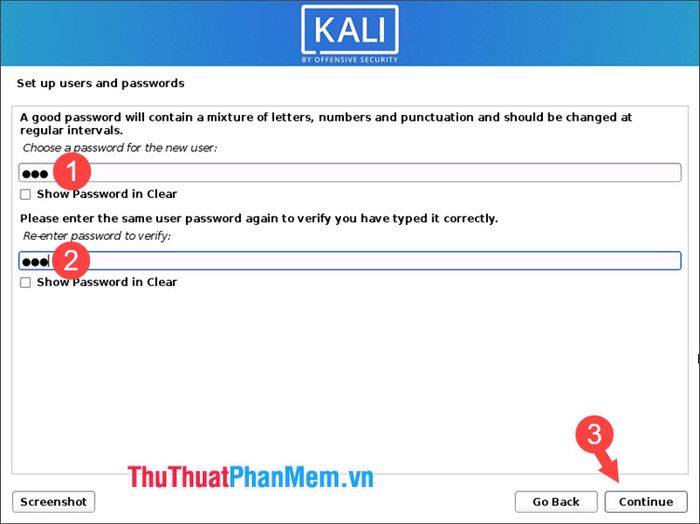
Bước 6: Nhập mật khẩu (1) và xác nhận lại mật khẩu (2) cho máy ảo Kali => nhấn Continue (3) để tiếp tục.
![](https://img.tripi.vn/cdn-cgi/image/width=700,height=700/https://gcs.tripi.vn/public-tripi/tripi-feed/img/482682rvj/anh-mo-ta.png)
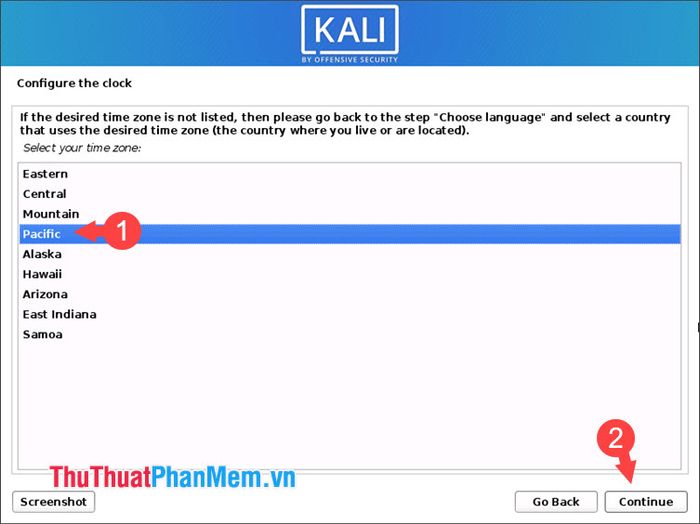
Bước 7: Chọn múi giờ Thái Bình Dương (Pacific) (1) => nhấn Continue (2) để thiết lập thời gian.
![](https://img.tripi.vn/cdn-cgi/image/width=700,height=700/https://gcs.tripi.vn/public-tripi/tripi-feed/img/482682Ydj/anh-mo-ta.png)
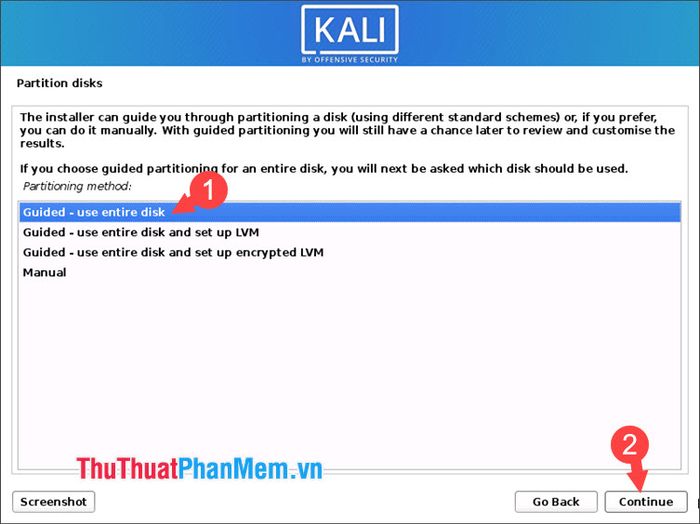
Bước 8: Chọn Guided – use entire disk (1) => nhấn Continue (2) để phân vùng ổ đĩa tự động.
![](https://img.tripi.vn/cdn-cgi/image/width=700,height=700/https://gcs.tripi.vn/public-tripi/tripi-feed/img/482682uMT/anh-mo-ta.png)
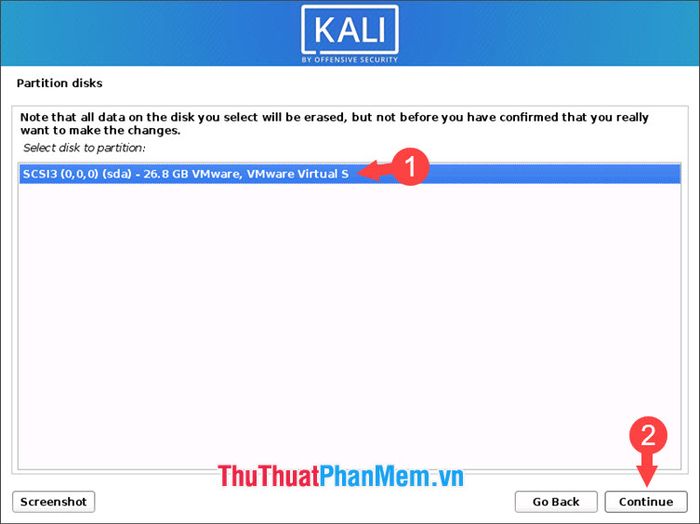
Bước 9: Chọn ổ đĩa ảo (1) để cài đặt hệ điều hành => nhấn Continue (2) để tiếp tục.
![](https://img.tripi.vn/cdn-cgi/image/width=700,height=700/https://gcs.tripi.vn/public-tripi/tripi-feed/img/482682DNm/anh-mo-ta.png)
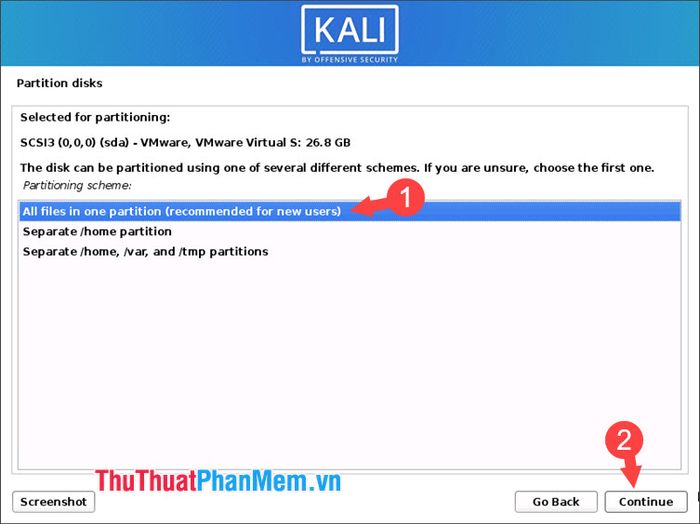
Bước 10: Chọn All files in one partition (recommended for new users) (1) => nhấn Continue (2) để phân vùng toàn bộ tệp vào một phân vùng duy nhất.
![](https://img.tripi.vn/cdn-cgi/image/width=700,height=700/https://gcs.tripi.vn/public-tripi/tripi-feed/img/482682pGF/anh-mo-ta.png)
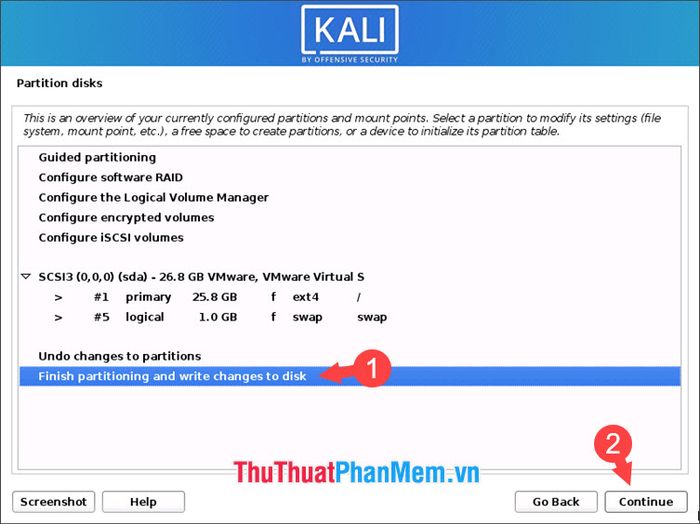
Bước 11: Chọn Finish partitioning and write changes to disk (1) => nhấn Continue (2) để hoàn tất phân vùng và ghi thay đổi vào ổ đĩa.
![](https://img.tripi.vn/cdn-cgi/image/width=700,height=700/https://gcs.tripi.vn/public-tripi/tripi-feed/img/482682IRf/anh-mo-ta.png)
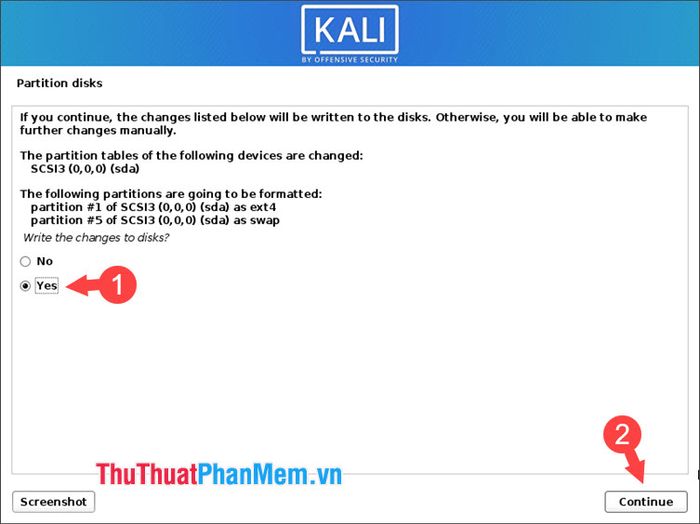
Bước 12: Chọn Yes (1) => nhấn Continue (2) để xác nhận ghi thay đổi.
![](https://img.tripi.vn/cdn-cgi/image/width=700,height=700/https://gcs.tripi.vn/public-tripi/tripi-feed/img/482682qsf/anh-mo-ta.png)
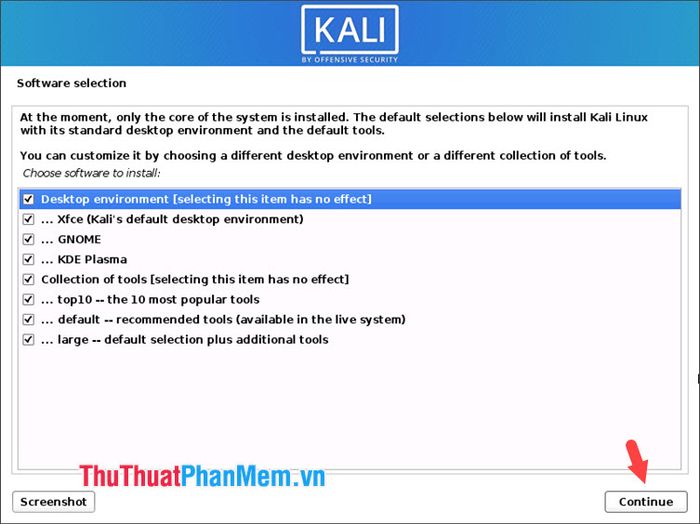
Bước 13: Đánh dấu vào các mục cần thiết và nhấn Continue để hoàn tất quá trình cài đặt.
![](https://img.tripi.vn/cdn-cgi/image/width=700,height=700/https://gcs.tripi.vn/public-tripi/tripi-feed/img/482682ijR/anh-mo-ta.png)
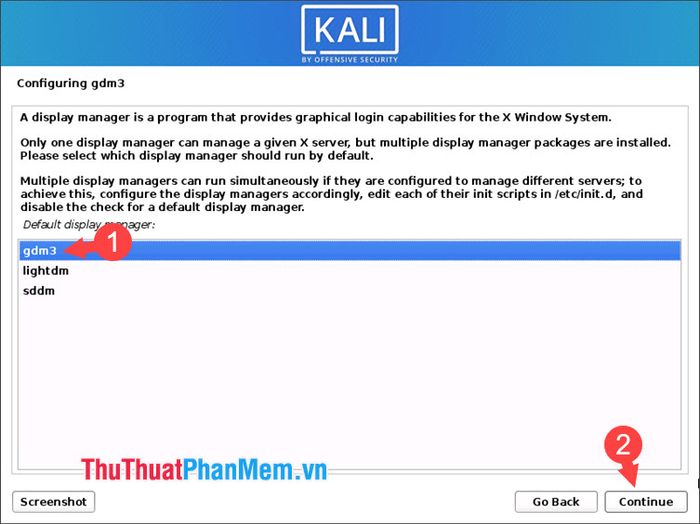
Bước 14: Chọn trình quản lý màn hình gdm3 (1) => nhấn Continue (2) để thiết lập giao diện đăng nhập.
![](https://img.tripi.vn/cdn-cgi/image/width=700,height=700/https://gcs.tripi.vn/public-tripi/tripi-feed/img/482682ZOc/anh-mo-ta.png)
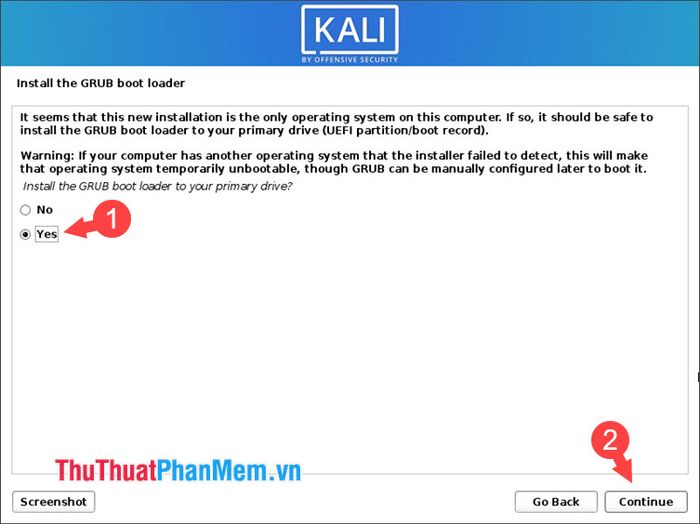
Bước 15: Nhấn Yes (1) để cài đặt GRUB boot => nhấn Continue (2) để tiếp tục.
![](https://img.tripi.vn/cdn-cgi/image/width=700,height=700/https://gcs.tripi.vn/public-tripi/tripi-feed/img/482682YrA/anh-mo-ta.png)
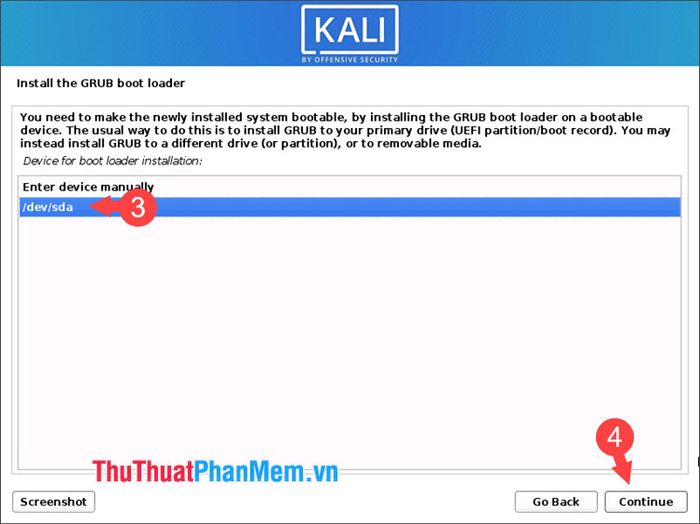
Tiếp theo, chọn ổ đĩa (3) để cài đặt GRUB => nhấn Continue (4) để xác nhận.
![](https://img.tripi.vn/cdn-cgi/image/width=700,height=700/https://gcs.tripi.vn/public-tripi/tripi-feed/img/482682LDj/anh-mo-ta.png)
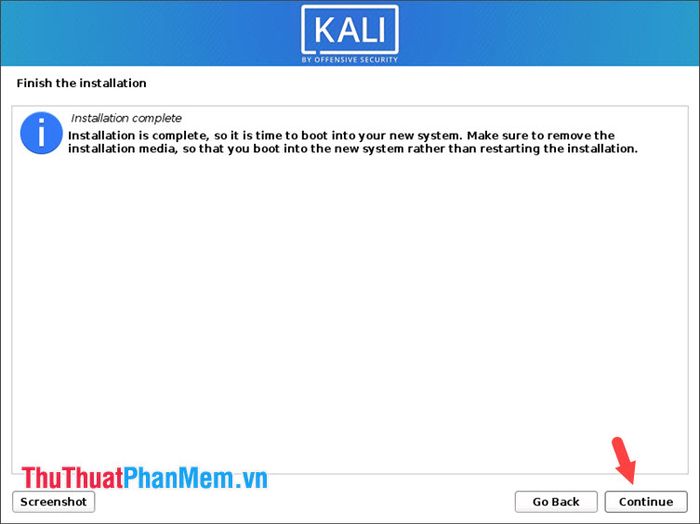
Đến bước này, bạn nhấn Continue để hoàn tất quá trình cài đặt Kali Linux.
![](https://img.tripi.vn/cdn-cgi/image/width=700,height=700/https://gcs.tripi.vn/public-tripi/tripi-feed/img/482682UCp/anh-mo-ta.png)
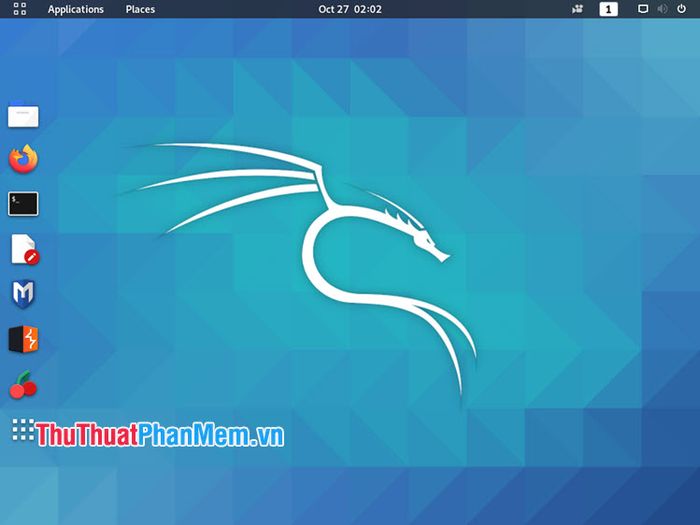
Bước 16: Sau khi khởi động lại Kali Linux, hãy đăng nhập bằng tài khoản của bạn để bắt đầu khám phá hệ điều hành.
![](https://img.tripi.vn/cdn-cgi/image/width=700,height=700/https://gcs.tripi.vn/public-tripi/tripi-feed/img/482682MLu/anh-mo-ta.png)
Giao diện chính của Kali Linux mang đậm phong cách Debian, với hình nền quen thuộc và các công cụ bảo mật mạnh mẽ được tích hợp sẵn.
![](https://img.tripi.vn/cdn-cgi/image/width=700,height=700/https://gcs.tripi.vn/public-tripi/tripi-feed/img/482682CBg/anh-mo-ta.png)
Với hướng dẫn chi tiết này, bạn đã có thể tự tin cài đặt và trải nghiệm Kali Linux trên VMware. Hãy khám phá thế giới bảo mật đầy thú vị và chúc bạn thành công!
Có thể bạn quan tâm
![Phần mềm quay màn hình cao cấp, chất lượng đỉnh cao](/blog/_next/image?url=https%3A%2F%2Fgcs.tripi.vn%2Fpublic-tripi%2Ftripi-feed%2Fimg%2F482682vjK%2Fanh-mo-ta.png&w=3840&q=75)
Phần mềm quay màn hình cao cấp, chất lượng đỉnh cao
![Phần mềm theo dõi và kiểm soát băng thông trên Windows](/blog/_next/image?url=https%3A%2F%2Fgcs.tripi.vn%2Fpublic-tripi%2Ftripi-feed%2Fimg%2F482681qmt%2Fanh-mo-ta.png&w=3840&q=75)
Phần mềm theo dõi và kiểm soát băng thông trên Windows
![Phương pháp khôi phục dữ liệu trên thẻ nhớ hiệu quả](/blog/_next/image?url=https%3A%2F%2Fgcs.tripi.vn%2Fpublic-tripi%2Ftripi-feed%2Fimg%2F482681lyb%2Fanh-mo-ta.png&w=3840&q=75)
Phương pháp khôi phục dữ liệu trên thẻ nhớ hiệu quả
![Top 10 Bot Discord xuất sắc nhất để nâng tầm server của bạn](/blog/_next/image?url=https%3A%2F%2Fgcs.tripi.vn%2Fpublic-tripi%2Ftripi-feed%2Fimg%2F482681sQh%2Fanh-mo-ta.png&w=3840&q=75)
Top 10 Bot Discord xuất sắc nhất để nâng tầm server của bạn
![Hướng dẫn chi tiết cách chụp màn hình cuộn và màn hình dài trên Windows](/blog/_next/image?url=https%3A%2F%2Fgcs.tripi.vn%2Fpublic-tripi%2Ftripi-feed%2Fimg%2F482681wtv%2Fanh-mo-ta.png&w=3840&q=75)
Hướng dẫn chi tiết cách chụp màn hình cuộn và màn hình dài trên Windows
![Hướng dẫn phát hiện lỗi bộ nhớ với Memory Diagnostic Tool](/blog/_next/image?url=https%3A%2F%2Fgcs.tripi.vn%2Fpublic-tripi%2Ftripi-feed%2Fimg%2F482681Cfg%2Fanh-mo-ta.png&w=3840&q=75)